
DIY Afterburner Mk2 diesel heater controller
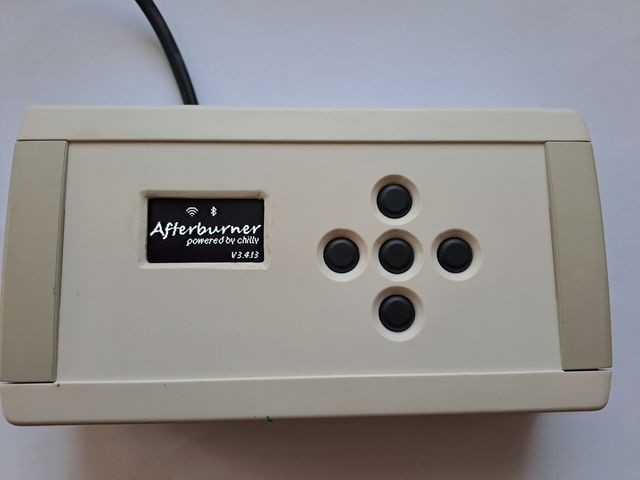
This is a DIY built aftermarket controller Afterburner Mk2 for the famous chinese diesel heaters, e.g. VEVOR brand.
The Afterburner Mk2 was original designed by Ray Jones. See his webpage. The motivation for a DIY design was to avoid any hassle with customs that arise when one tries to import DIY hardware (from Australia or elsewhere) into Europe, especially in Germany.
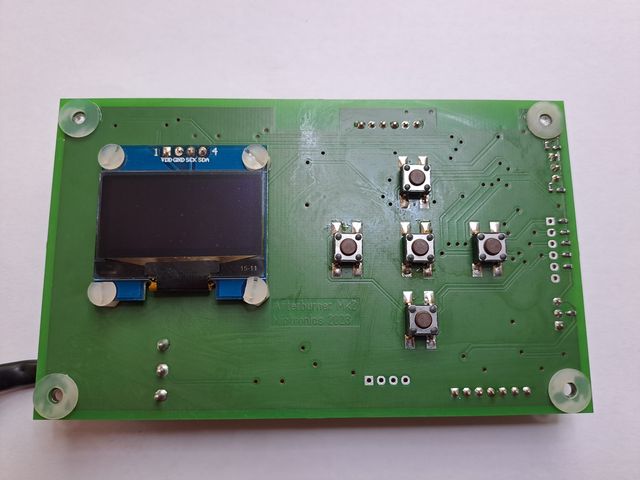
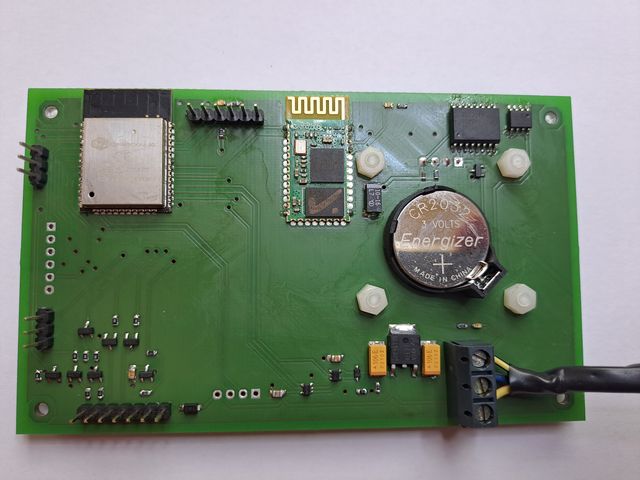
MY DIY design follows the Afterburner Mk2 schematic that can be found in the original user manual. Additional information can be found in the related Gitlab repository.
Following donor boards (from Amazon) have been used for components:
- AZDelivery 1,3 Zoll OLED Display I2C SSH1106 Chip 128 x 64
- AZDelivery HC-05 HC-06 Bluetooth Wireless RF-Transceiver-Modul
- AITRIP Pack ESP32 ESP-32S
- AZDelivery Real Time Clock RTC DS3231 I2C
The rest of the components can be found on Digikey or Mouser.
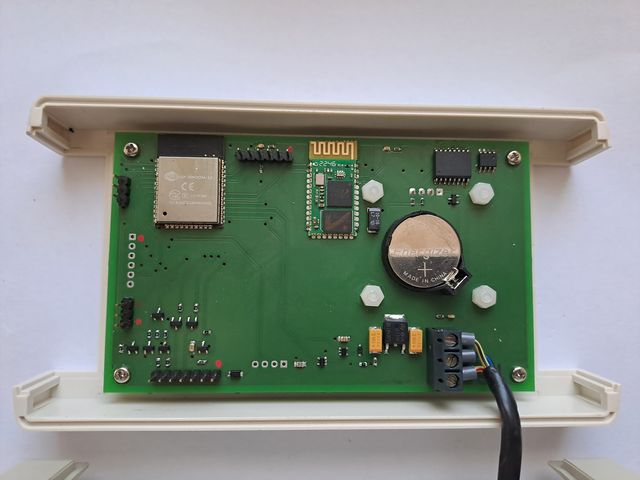
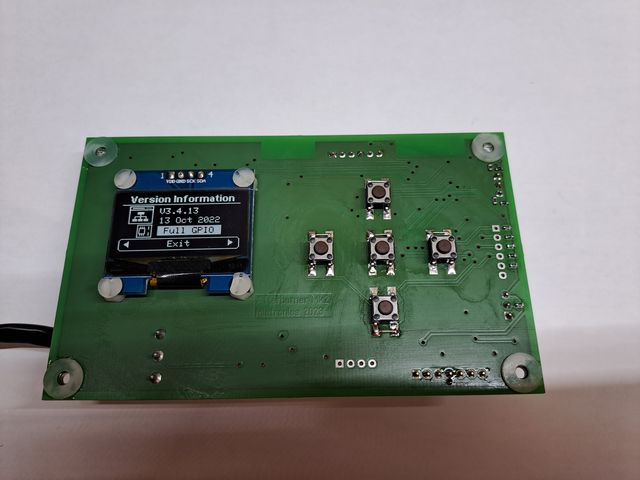
The PCB is designed to fit into an OKW TOPTEC 154F (B1065365) housing that was laying around.
Everything works as expected with a diesel heater VEVOR WF5001. However, I had to change the heater control motherboard to one being compatible with the Afterburner Mk2 firmware (blue line protocol). Replacement motherboards are available on eBay, e.g. 235077415445.

The latest firmware v3.4.13 indicates full functionality, including analog input and GPIO.
Firmware is available for download on a separate webpage.
Debugging and setup #
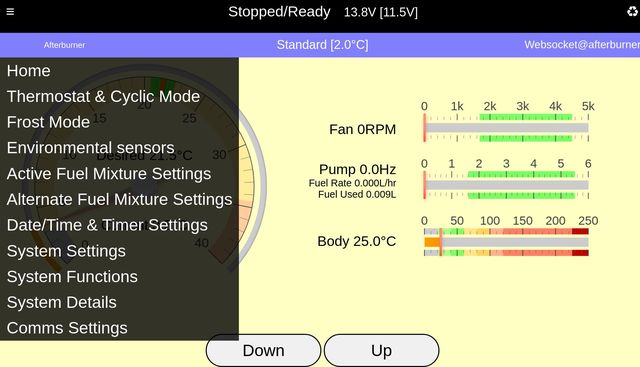
Debugging and setup is possible web browser.
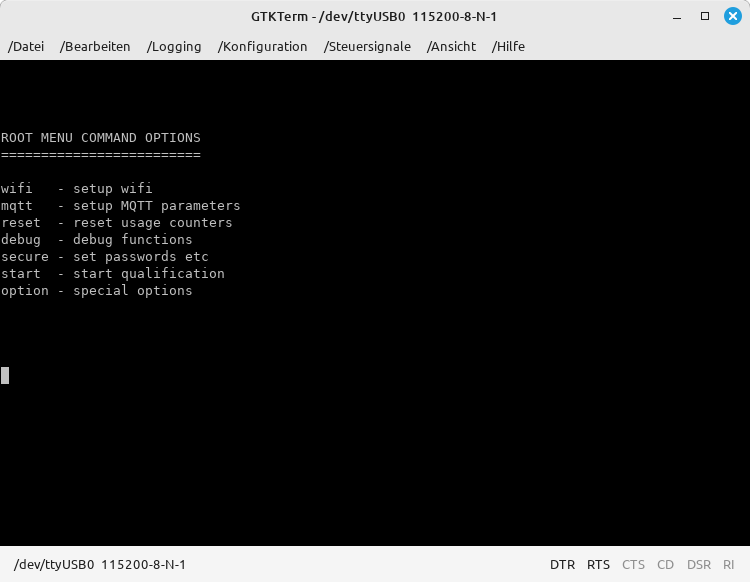
... or via serial console. When using a FTDI USB adapter, make sure it has been jumpered for 3.3V operation.
MQTT setup #
Albeit MQTT setup is described in the Afterburner Mk2 user manual it was a bit tricky to setup subscription for the topics.
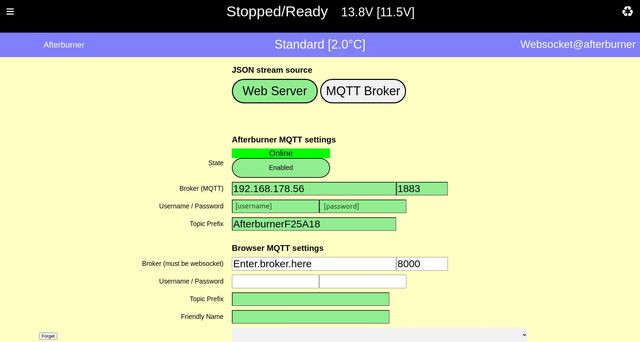
The setup requires the MQTT brokers IP and port, authentication username and password and the unique topic prefix. The topic prefix was set according to the user manual recommendation.
Subscription to the following topics is then possible:
AfterburnerF25A18/sts/...= Afterburner statusAfterburnerF25A18/JSONout= Afterburner JSON output
Afterburner control is possible by publishing to the following topic:
AfterburnerF25A18/cmd/
See configuration.yaml 👇 for example topic subscription.
Including into Home Assistant (HASS) #
Once MQTT is successfully setup, the Afterburner controller can be included into Home Assistant. Found some examples for configuration.yaml and automation.yaml.
Modified to what I am using now:
automation.yaml
alias: Get Heater Status
description: ""
trigger:
    #  - platform: homeassistant
    #    event: start
    - platform: time_pattern
      # Matches every hour at 5 minutes past whole
      minutes: "/1"
condition: []
action:
    - service: mqtt.publish
      data:
          topic: AfterburnerF25A18/cmd/Refresh
          payload: "1"
mode: single
The AfterburnerF25A18 needs to be equal to the topic prefix set during MQTT configuration.
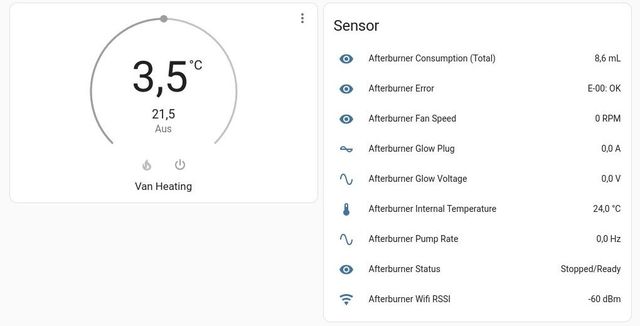
configuration.yaml
mqtt:
    climate:
        - name: Van Heating
          action_topic: "AfterburnerF25A18/sts/RunState"
          action_template: >
              {% if value in ("0", "1", "6", "7", "8") %}
                off
              {% elif value in ("10", "12") %}
                idle
              {% else %}
                heating
              {% endif %}
          current_temperature_topic: "AfterburnerF25A18/sts/TempCurrent"
          max_temp: 35
          min_temp: 8
          modes:
              - "off"
              - "heat"
          mode_state_topic: "AfterburnerF25A18/sts/Run"
          mode_state_template: >
              {% if value == "1" %}
                heat
              {% else %}
                off
              {% endif %}
          mode_command_topic: "AfterburnerF25A18/cmd/Run"
          mode_command_template: >
              {% if value == "heat" %}
                1
              {% else %}
               0
              {% endif %}
          precision: 0.1
          temperature_command_topic: "AfterburnerF25A18/cmd/TempDesired"
          temperature_state_topic: "AfterburnerF25A18/sts/TempDesired"
          temp_step: 0.5

    sensor:
        - name: Afterburner Status
          unique_id: afterburner_status
          state_topic: "AfterburnerF25A18/sts/RunString"

        - name: Afterburner Error
          unique_id: afterburner_error
          state_topic: "AfterburnerF25A18/sts/ErrorString"

        - name: Afterburner Internal Temperature
          unique_id: afterburner_internal_temp
          state_topic: "AfterburnerF25A18/sts/TempBody"
          device_class: temperature
          unit_of_measurement: °C
          state_class: measurement

        - name: Afterburner Consumption (Total)
          unique_id: afterburner_consumption
          state_topic: "AfterburnerF25A18/sts/TotalFuelUsage"
          unit_of_measurement: mL
          state_class: total_increasing

        - name: Afterburner Pump Rate
          unique_id: afterburner_pump
          state_topic: "AfterburnerF25A18/sts/PumpActual"
          unit_of_measurement: Hz
          device_class: frequency
          state_class: measurement

        - name: Afterburner Fan Speed
          unique_id: afterburner_fan
          state_topic: "AfterburnerF25A18/sts/FanRPM"
          unit_of_measurement: RPM
          state_class: measurement

        - name: Afterburner Glow Plug
          unique_id: afterburner_glowplug
          state_topic: "AfterburnerF25A18/sts/GlowCurrent"
          device_class: current
          unit_of_measurement: A
          state_class: measurement

        - name: Afterburner Glow Voltage
          unique_id: afterburner_glowvoltage
          state_topic: "AfterburnerF25A18/sts/GlowVoltage"
          device_class: voltage
          unit_of_measurement: V
          state_class: measurement

        - name: Afterburner Wifi RSSI
          unique_id: afterburner_wifirssi
          state_topic: "AfterburnerF25A18/JSONout"
          device_class: signal_strength
          unit_of_measurement: dBm
          state_class: measurement
          value_template: "{{ value_json.IP_STARSSI }}"

        - name: Afterburner Input Voltage
          unique_id: afterburner_inputvoltage
          state_topic: "AfterburnerF25A18/JSONout"
          device_class: voltage
          unit_of_measurement: V
          state_class: measurement
          value_template: "{{ value_json.InputVoltage }}"
Disclaimer #
Credits to Ray Jones for creating this project. 👍
⛔️ I will neither sell or rebuild my project nor otherwise distribute details, schematic, layout etc. so do not ask. ⛔️
👈 Home